|
...Continued from Page 14.
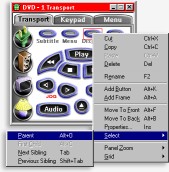
Right-Click Options |
Do the shuffle!
Moving buttons around the page is done by either clicking-and-dragging with the mouse or, for more accurate positioning, clicking and moving with the keyboard arrow keys. Holding down the space bar when using the arrow keys will move the button in 10-pixel jumps. The button's current positional coordinates are always displayed in the lower status bar. Pressing [TAB] will advance to the next button (known as a "sibling").
A wealth of options can be found by right-clicking over the button - clipboard cut/copy/paste, quick change of name, plus options to move in front or behind other objects. Adding a blank new button can be done by right-clicking over an empty portion of the panel and selecting "Add Button", or using the menu at the top of the screen.

Multiple buttons can be moved as one when placed in a frame. |
Another design alternative is "Frames". Frames can be used to display a bitmap that has no function, draw simple lines or colored rectangles, or group other buttons and frames together as a single movable object. The vast amount of memory available on the ProntoPro means you may have to work quite hard to use it all. Each panel can hold up to 255 frames or buttons - and each frame (known as a "Parent") can hold up to 255 additional frames or buttons ("Siblings"). So, the actual maximum number of buttons per page is, on an technical basis, effectively limitless. Philips seems to have worked on the ProntoPro's display code. I was successful at getting the remote to display a single panel with more than 250 total buttons - it was slow, but it worked. The same file in the TSU2000 topped out at 120 tiny buttons before it would spontaneously reboot.
Since ProntoProEdit can only work with or select one button at a time, complex structures such as keypads and transport controls must be grouped together with frames if you plan on moving them easily. This is accomplished either by manually cutting-and-pasting each existing button into a blank frame, or by creating them in the frame to begin with. This is a somewhat awkward process - when moving a framed object you must click on an unused portion of the frame, otherwise you move the object inside the frame. Philips needs to come up with an easier-to-use grouping system, along with the ability to move several things around at a time without needing to frame them.
Starting from scratch.
If you plan on creating a design completely from scratch, loading a bitmap manually into each and every button would take much too long. So, ProntoProEdit includes two ways to quickly add prepared buttons. The first is by clicking-and-dragging while holding the [CTRL] key - this will duplicate that button in its entirety. Performing the same maneuver with the [ALT] key will only copy the bitmaps from one button and apply them to another. No shortcut is provided to copy the action list or other button properties.
But the easiest way to manage button styles is through the "Gallery". The gallery is a floating window that can contain any number of pages, each of which can be filled with buttons. These buttons can feature predefined bitmaps, colors, labels and basic command structures. To add a new button, just drag it off the gallery and onto a panel. Custom galleries can be created by opening the "gallery.ccf" file, located under the base ProntoProEdit directory. New to ProntoProEdit is an additional option from the Tools Menu - "Select Gallery". From here you may change from the default "gallery.ccf" file to another gallery file - no need to restart ProntoProEdit for the change to take effect! The only shortcoming is that the software will default back to the standard "gallery.ccf" when it is restarted. Still, this is a most welcome addition.
   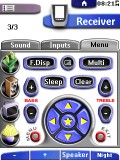
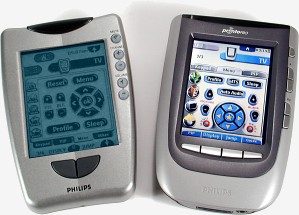
Interfaces from left to right: Original TS-1000, ProntoPro default, my customized TSU2000, my new ProntoPro color design. |
|