|
...Continued from Page 7.
Full-Screen Interfaces
Next comes the Custom Button Editor, which is very similar to the Button Bitmap Editor. The difference here is that you edit the entire screen at once – a full 64x96 pixels. You are still limited to the same 2 by 6 button layout grid, but there are no automatic padded spaces between buttons. Once you’ve designed the layout or imported it from another file you must use the "Button Selection Tool" to define how your buttons are placed. This is so the remote knows exactly how large and how many buttons you have.

Custom Button Editor
|
Unlike the Bitmap Editor which is designed to automatically reverse a button when depressed, you must provide both normal and "pressed" bitmaps for each full-screen layout. The pressed version is displayed when a macro is running or a button is pressed. When operating, the remote is smart enough to only apply the selected portion of your bitmap for the button that is pressed – the rest of the screen remains with the normal image. This means you don’t need a whole number of bitmaps covering all possible combinations of "normal" and "selected" buttons. Text labels cannot be applied to custom buttons, so they must be defined as part of the bitmap. The software allows use of the default T2 screen font or any other Windows font you wish to use.
Unfortunately, 64x96 pixels with only two colors is extremely limiting for a designer – I actually found most full-screen button layouts looked worse than simply using the quick-and-easy standard text and button tools. However, if you wish to experiment full functionality is provided.

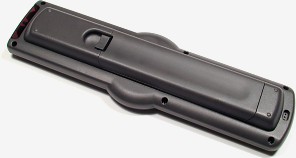
Backside of the TheaterTouch T2.
Click to enlarge. (26kb)
|
Memory Usage & Previewing
After you’ve tweaked and twiddled with your file it’s now time to preview it. First, you may determine how much memory is being used by pressing F9. This displays a pie chart detailing what percentage of memory is used by buttons, bitmaps, custom buttons, commands, macros and system data, along with how much of the 128kb total space is still available. 128kb may not seem like a lot, but after configuring my whole system I still had over 75% free. Finally, you may press F6 to switch to Preview Mode. This allows you to see exactly what the remote looks like and how it will operate, complete with buttons, macros and page jumps. Right here is where you’ll probably encounter any configuration flaws (as I did). First, all pages (or devices) must be accessed from buttons with page jumps on the Main Menu. There’s no other way. Additionally, while the Main Menu button under any page may be assigned to jump to any page, you must still provide a way to get back to the device list, otherwise your remote may end up in an unusable state.
| 
