|
...Continued from Page 5.

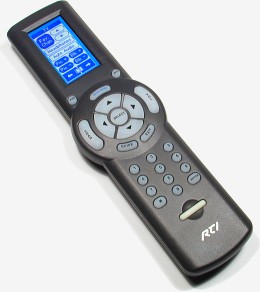
Top view of the T2.
Click to enlarge. (46kb)
|
Pages & Screens
For my layout I created a separate page for each device – TV, VCR 1, VCR 2, DVD, Tape, Receiver, Tuner. I also created pages for other activities such as VCR dubbing, theater lighting and favorite channel icons. To begin with I worked on the TV device. A toolbar includes various commands for working on physical buttons: "Assign Command" and "Edit Macro". Clicking on "Assign Command" brings up the Command Library window which includes all of your remote controls as learned in the IR Library Manager. All that’s required to transfer a command is to select it on the list and drag it to the button you wish to place it on. All buttons with a command display a small red "C" in the top right. Hovering the mouse cursor over a button presents a popup window identifying the assigned command.
If you select the "Edit Properties" tool and then a button with an IR command you are presented with a new window. Here you can configure advanced functions, such as whether the button is passcode protected, what the output options are (RF or IR), how the code should interact with the IRF-6 basestation (which will be described later) and what the full command name is. You even get to see a graphical representation of the waveform which is described good-naturedly in the manual as being there "if you would just like to see what infrared data looks like". More obscure functions can be assigned to any button, such as adjusting the contrast, powering down the remote, pausing the remote (though I haven’t quite figured out why you’d want to), and creating RS-232 commands.
In addition to commands, a button can also have a page jump. This switches the remote to another page (or device) and can be configured to access the last page viewed. This shows up as a small icon with the page number in the bottom left ("PR" if the "Previous" command is used). Unfortunately you cannot specify the exact LCD screen of a page to jump to, so it always defaults to the first. Finally, hard buttons can hold a macro, which is where the advanced functionality of the TheaterTouch T2 becomes apparent.

TheaterTouch Designer Macro Editor
|
Macros & More Macros
The Macro Editor provides a whole new world of functionality – this is where the remote really shines. Using an easy drag-and-drop interface, users can create complex sequences of up to 64 events using a number of unique functions. IR codes can be inserted from the IR Library or linked to from other pages (better known as "aliases"). If one of your components requires a longer hold of a button than normal, IR codes in macros can be configured to transmit for a minimum number of times. A single button in a macro may also be configured to repeat for as long as the button is held. So the beginning of the macro would play, the single command would send for as long as the button is held, and when it is released the rest of the macro would continue. RS-232 codes in combination with the IRF-6 and communications module may also be used throughout.
The "Button Test" function allows the remote to determine whether a button is double-clicked or held down for a particular length of time and send a different series of commands depending on the result. Other macro functions include delays from 0.1 to 9.9 seconds (0.3 is always automatically added), pause until a button is released, link to another page at the end of the macro, stop the macro (ideal if certain conditions are not met) and finally toggle between two different IR codes on each button press. This last one will be of particular interest to users with components that require a toggle or parity bit to operate properly.
| 
