|
...Continued from Page 2.
LCD... Limited Contrast Display?
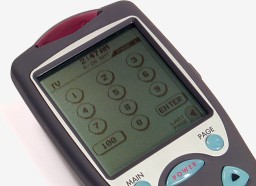
The LCD screen is backlit by the same aqua green EL panel as the buttons and interestingly the two colors appear identical. Screen size is 2 1/8 inches wide and 2 5/16 inches high (5.4x5.9cm) with a diagonal of 3 1/8 inches (8cm), providing a total of 4.9 square inches (32cm²) of space. Used portion of the screen is 2 inches wide and 2 3/16 inches high (5.1x5.6cm). The resolution of the screen is reportedly 160x240, an odd ratio in any book, but enough to make it one of the top three highest resolution touchscreen remote controls available for under $1000 (at the time of this writing). The LCD features four gray shades, although dark gray is nearly indistinguishable from black. Screen contrast could be higher, but the screen is still quite visible with the aid of the backlight. The MX-1000 provides software contrast control by holding the [MAIN] button and pressing [CHANNEL UP] or [CHANNEL DOWN]. The only problem with the adjustment range is that the absolute lowest setting is the only one that works. Anything higher causes the normally blank background to fade to black. On a normal contrast scale of 0 through 20, it seems the only available adjustments are from 10 through 20. I was unable to find an angle where the screen looked better than it did with the default contrast setting.
Getting configured –or– a clock from two worlds...
So, down to using the remote control. When the four AA batteries are first popped in you’ll be greeted by a little musical tune. A quick self-diagnostics appears on-screen, and is soon replaced with the setup menu. To access the menu later, hold the [MAIN] and [PAGE] buttons for about six seconds. (Wouldn’t three have been adequate?) Eight options are available, covering system setup, preprogrammed codes, learning codes, button editing and more. The first item you’ll want to set is the clock. Since there’s no keypad, cursor movement is done via the joystick. Pressing on the stick selects the highlighted item. A full date is available, with year, month, day, day-of-week and time, making the lack of programmable user timers all the more conspicuous. Plus, although the clock is permanently set to 12-hour time, with AM and PM, midnight enigmatically shows up as 0:00AM.
Once you’ve set the time you’ll want to move on to other setup particulars. Moving the cursor to "SYSTEMS & OPTIONS", you’re presented with a new screen with beep status – low, high or off – along with backlight and LCD duration settings. You can even adjust how low the battery can get before the remote displays a low-level warning, from 10 to 50 percent.
|