|
...Continued from Page 10.
MX-1000 Operating Program (v1.40.0)
Approximately two months after we reviewed the Home Theater Master MX-1000, Universal Remote Control finally released their eagerly anticipated PC editing software package – predictably titled "MX-1000 Operating Program". This review, in an attempt to conserve keystrokes, will refer to it simply as "MXOP". Since no documentation is included with the software, I’ll also try to explain basic operation.

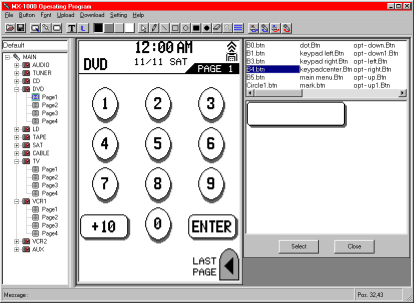
MXOP's main screen.
|
MXOP’s sole purpose is to allow custom button layout design for the MX-1000’s 160x240 pixel 4-color LCD display. It essentially does little more than the base remote control, but is oh-so-much easier to use. The main screen of MXOP contains a toolbar at the top with numerous shortcut buttons. Below that and to the left is a tree view of the layout file. In the center is a preview of what the LCD screen will look like (this is where you do all your work), and to the right is your button selection screen, known in the software as the "Button View".

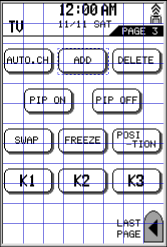
MXOP's editing grid.
|
Screen Layout
Using MXOP may at first appear intimidating, but it’s really not that hard. The first area to cover is the file tree, which displays the entire file in a logical layout of devices, pages and the "Main" screen (plus "Main1" if it exists). At this time there’s no way to add, remove or reposition a device in the list. There’s a maximum of four panels under each device, but as you can’t delete unused ones there’s also a minimum of four. Unused panels, whether blank or not, will still be shown on the remote.
To add a button you must first select the device and panel on which you want the button, then the actual button image in the "Button View". The lower half of the window displays a preview of the image. Below that is a "Select" button that, when pressed, will place the button on your mouse cursor. Move the cursor to where the button should go in the editing window, then click to drop. Before you can edit an on-screen button, you must first make it the active section by clicking on it – a dotted blue line will appear around it. Buttons can be moved with either the mouse click-and-drag method or, for more precise adjustments, with the keyboard’s arrow keys followed by "Enter" to confirm the new position.

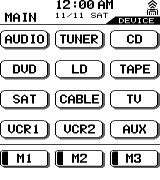
Before...
|

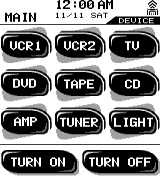
After!
|
On the toolbar is a "Grid" button that adds a solid blue grid over the editing window. While this initially seems like a great idea for easily positioning objects, the grid is not customizable in any way – nor can you "snap to grid". So, to align objects properly you’ll need to look at the bottom right corner of MXOP where its positional coordinates are displayed. The problem is that it also displays the current mouse cursor position – so in order to check where a particular button is located you must click on it, then move it using the arrow keys one pixel in any direction (and then, of course, back again).
| 
