Preparing the ingredients.
Before delving into the Harmony’s setup, it’s important to first write down a little bit about your home theater and how it works. Although in most situations the Harmony’s device database will already know the specifics of your devices, this information is crucial if a model number is not recognized.
You’ll need:
- The component type, brand and model number for all of your devices.
- How power is controlled on your devices – one button, two buttons, etc.
- How inputs are selected on the television and/or receiver – one button, separate buttons, on-screen menu, etc.
- Which inputs your components are connected to on your television and/or receiver.
- Optional but highly recommended, gather all of your original equipment remotes together.
As the sticker attached to the Harmony 1000’s USB port cover cautions, be sure to install the software before connecting the remote to your computer. The remote we received came with a CD containing version 7.1 software, but for the purpose of this review we downloaded the latest available from Logitech’s website, version 7.3.2.
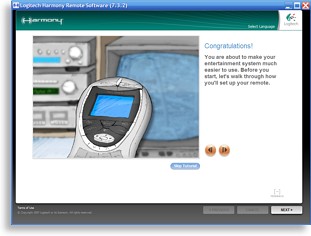
The software installed quickly and on the first run automatically checked for updates (there were none at the time, although by the review’s completion the software had been updated to 7.4.3). After that there’s an option to run a brief tutorial, which essentially duplicates the printed startup guide with new graphics. Users are then directed to either login to an existing Harmony account, or create a new username and password. Each Harmony account can only have one main remote control associated with it, so if you’ve previously owned a Harmony you’ll need to either replace the remote model assigned to your current login (which preserves some of your existing system settings), or start over from scratch with a brand new user ID. The software can be made to remember your username and/or password, but will not automatically login.
As the first step in the setup wizard, the software asks for the Harmony 1000 to be connected to the computer. A driver is automatically installed, after which it goes through the process of updating the remote’s firmware, something that takes a few minutes to complete. Next it asks whether a wireless extender will be used, and if so proceeds to update its firmware as well. Unlike most RF extenders this is a fully computerized piece of hardware that requires programming synchronization with the Harmony 1000 handheld. Although the final screen indicates that it’s possible to add further remote controls to the configuration, that only works for the multi-zone Harmony 890 Pro model. Additional wireless extenders may be added to extend the system’s operational range.
Creating a home theater profile.
The software moves swiftly from prepping the new hardware right into the main programming process. The first configuration step is to enter everything about your system devices – type of device, brand, model and so forth. Although this is generally a straightforward process, it’s not always clear which device category is the most appropriate. Is an off-air/cable HDTV receiver with PVR capability a “cable box”, a “digital set top box”, or a “PVR”? Does it even matter? In the end I opted to go with the most complicated match, which for our sample device would be a “PVR”.
|
|


 Enlarge this screenshot.
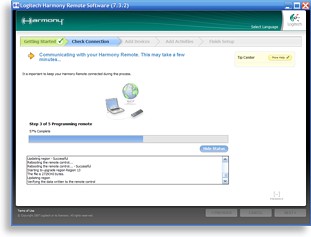 Enlarge this screenshot.
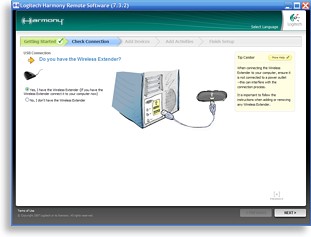 Enlarge this screenshot.